Last week I made a fruit torte where I first put the batter in and then topped it with fruit. As soon as it was in the oven I thought the recipe lent itself to being an upside down cake. That's a cake where you put the fruit in the bottom of the pan and put the batter on top - hence the upside down label.
I started by rubbing some butter in the bottom of the baking pan, sprinkled some brown sugar on top of that, and then placed the fruit (in our case frozen blueberries) so that they covered most of the bottom, allowing only a bit of brown sugar to show through. I then topped this with a bit more brown sugar. I didn't alter the first recipe batter - I mixed it up and put it directly on top of the fruit/brown sugar layer. It did take a bit of spooning and gentle spreading to get the fruit covered, and it certainly wasn't the smoothest of batters when I was finished ... but baking settled everything down into a more uniform top.
It doesn't look like much here - I'm sure if I'd taken the time to flip it onto a plate it would have looked much more elegant ... but it was so yummy that it just didn't last.
The last bite ...
This torte did not last more than a few days.
Monday, October 28, 2013
Wednesday, October 23, 2013
Dining Room Chairs - ReUpholstery Update
Just so you don't think I've forgotten.
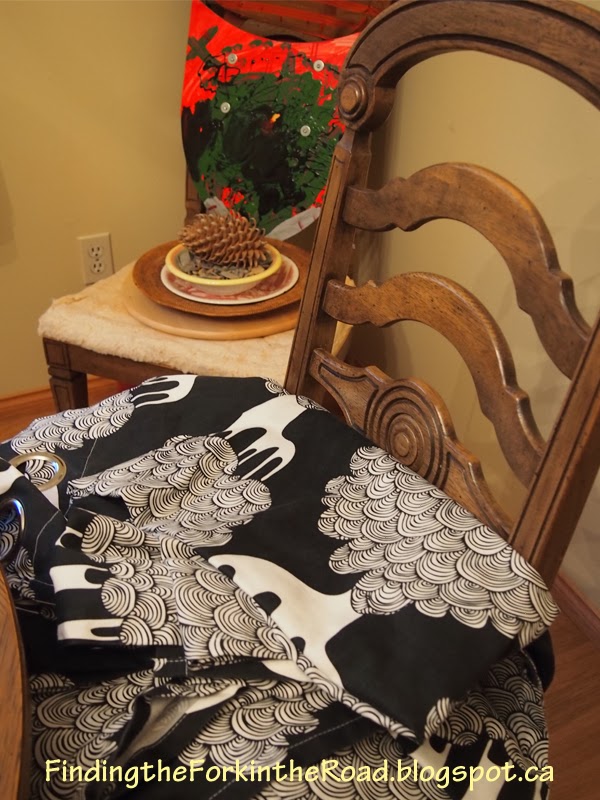
See? I actually pulled out the package of Ikea curtain fabric two weekends ago and washed it. Then? It sat on my chair by my bed for another week. Last weekend I finally found the tools I'd been using to pull off the old seat covers (we had guests, things got moved, I couldn't find things for quite a while). I brought them up from the basement and they sat on the dining room table for the week. Yesterday, I moved the washed curtain fabric to the dining room. This is progress, right?!
You can see the chair in the background, naked, without any fabric. It's been waiting all this time to be re-covered.
I'm hoping my inertia on this project will slowly give way ... and that finally that first chair will no longer be naked. At this rate, the seven chairs will all be re-covered by ... ah, I can't even think how long that will be. I've got to get this thing done!
Labels:
decorating,
DIY,
how-to
Tuesday, October 22, 2013
Fruit Torte
It's been awhile since I've blogged about any recipes that I've tried out. Which isn't to say I haven't tried out any. It's just that baking and cameras don't mix and I sometimes (often) forget to pull out the camera. I did manage to pull out the camera to get a shot of this very yummy fruit torte before it disappeared.
I found this recipe on the Smitten Kitchen blog. It goes by the name Purple Plum Torte. I didn't have any plums, but we have about fifteen boxes of apples ... so I made an Apple Torte.
Yes, Manuel picked these fifteen or so boxes of apples in late September when he went to help harvest the grapes at his parents farm. Yes, we have been giving away a lot of apples to friends. Yes, we have a second fridge just for this over-abundance of fruit. Yes, I think we are crazy too ;)
The recipe is incredibly easy, so I hope you'll try it. I expect you could use almost any fruit of your choosing.
Ingredients:
Flour - 1 cup
Baking Powder - 1 teaspoon
Salt - large pinch
Sugar 1 cup // plus 1-2 tablespoons
Unsalted Butter, softened - 1/2 cup
Eggs - 2 large
Fruit - 2 apples
Lemon Juice - 2 teaspoons
Cinnamon - 1 teaspoon
Heat oven to 350F. Pull out a 9" spring form pan so that it's ready.
Peel, core, and slice the apples. Place in a medium bowl. Sprinkle the 1-2 tablespoons of sugar, followed by the cinnamon and lemon juice. Mix with your hands to coat. Set aside.
Stir together the flour, baking powder, and salt in a medium bowl. In a large bowl cream the butter and sugar until fluffy and light in colour. Add the eggs, one at a time. Then add the dry ingredients, mixing until just combined.
Spoon the batter into the spring form pan and smooth the top. Arrange the fruit all over the batter, pushing slightly in. bake until the cake is golden and a toothpick inserted in the centre comes out free, about 45-50 minutes (40-45 convection oven time, with 325F). Cool on a rack.
Monday, October 21, 2013
How a Guinea Pig Stole Our Hearts
I've been remise in introducing you to our newest family member - Cutey.
For several months Walter has been begging for a pet. Throughout the summer we talked to him about the responsibility of having one. Finally, we agreed that once school started we'd start looking. We then began discussing the possible types of pets - hermit crabs, fish, hamsters, cats, dogs. Walter and I wanted a cat, but Manuel didn't. Manuel wanted a dog, but I didn't. Finally, three weeks ago we met the perfect pet ... a lovely, young, American Short Haired Guinea Pig. Cutey came home with us that day (Walter picked the name).
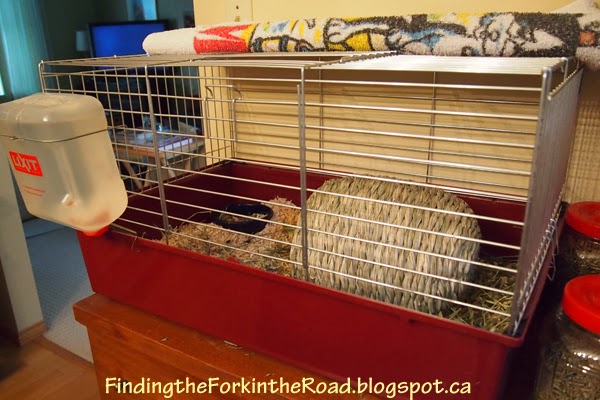
Before I met Manuel I had a guinea pig - Daisy. Daisy transitioned to our pet. We had both enjoyed her, and it was a very sad day when she died. We thought on occasion about getting another one ... but somehow, it didn't happen. Still, we kept all the equipment. Which meant, that bringing home Cutey wasn't too difficult. We just needed some saw dust, hay, and food pellets.
In just three short weeks she's become an integral part of the household. When she hears the fridge open she'll squeak to remind you to get her something. And at some point during the day you can hear her racing around her cage, getting in some exercise before settling into her nest to relax with some apple. She likes to sit on our laps, watching Walter play Angry Birds Space.
Of course, I knew that bringing home a pet for Walter would mean I would be taking on more work in caring for her. That's OK. I love having a pet in the house - she's probably the easiest member of the household with the sweetest disposition.
Sunday, October 20, 2013
Batty Halloween Craft and Creating Memories
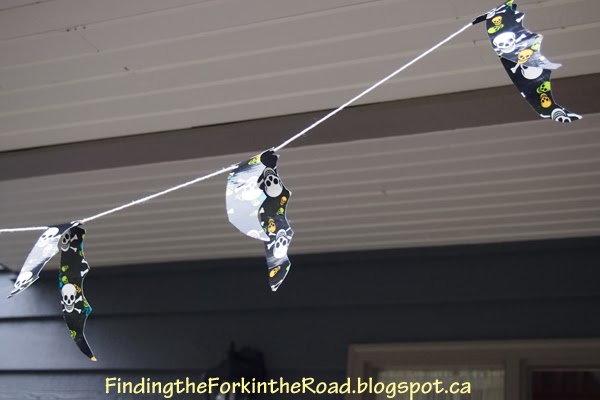
I love Valentines Day, Easter, July 1st Canada Day, Thanksgiving, Halloween, and Christmas. Walter makes these times even more special, and I love to do something memorable to make a lasting impression. Halloween's great because I can be a little silly about things. When I saw someone using black duct tape to make bats I thought it looked easy and doable. Of course, I didn't have black duct tape, but I did have something a bit ghoulish and definitely Halloween-ish. So, while Walter sat on the dining table playing with his Lego I whipped up a garland of duct tape bats.
Aren't they charming? And so easy to do. All you need is a roll of duct tape, some string, and scissors.
I cut a length of string - in my case I did about five feet. I then began by cutting off a strip of duct tape about 8" long, laid it sticky side up and placed the string about mid-way between the two ends. I then cut off another strip of duct tape the same length and stuck it on top of the first piece, sandwiching the string between. I cut a simplistic bat shape out of the sandwiched tape, with the string taking up the body/head portion. One bat down, five more to go.
The final garland took all of 10-20 minutes to do.
The duct tape gives the bats just enough shape while allowing some "natural" batty movement to occur. The best part is that they are water proof and we can hang them outside without worrying about the rain. They were the final piece of Halloween decorating that went up today.
You might be noticing a different colour to our front door, mailbox ... and, in fact, to the house itself. Yes, we had the exterior of the house painted. Once Manuel has the shutters back in place I'll take some photos and show you the results.
Before we did our Halloween decorations outside the house we went for our yearly pumpkin picking on Westham Island. This has become something of a family tradition for us. I think this must be our fourth year going? The farm we go to does a great job in getting everyone into the spirit.
Along with the pumpkin theme, the farm has some animals that the children love to visit - donkeys, goats, chicken, and cows.
Of course, the most important part of the day is finding our pumpkins.
The whole day was very inspiring ... especially for Walter who started practicing his monster moves.
The funny thing is, he's not going as a monster - he chose a policeman costume!
Subscribe to:
Comments (Atom)


