Pages

Showing posts with label how-to. Show all posts

Tuesday, May 06, 2014

Learning the Art of Bread Making

I have been making bread for many years now.  Sometimes with success, sometimes ... well, the results haven't always made me happy.  With the recent purchase of my Bosch Universal Plus Mixer (four months and counting!) I have not had a failure.  Is it the machine or have I been slowly learning the art - and science - of bread making?

Bread, at it's essence, is the simple marriage of wet (water, milk) with the dry (flour, salt, sugar).  The leavening agent (yeast) along with some lubricant (oil, butter) brings the happy union together.  The heat of the oven finishes things off.  The result?  Heaven.  Yet, making bread scares most of us.  I know it did me for many years.  Bread can be temperamental.  It needs to be worked to bring out the glutens in such a manner that the yeast will properly marry to it.  Only then will you get the proper rise required for a delicious loaf of bread.  Kneading, so required for that success, is something learned over time.

I have to give credit to my pizza making recipe for teaching me how to knead.  The recipe created a small enough amount of dough that I was able to learn how to knead.  I learned the right look and feel of the dough.  The soft touch that meant the dough was ready to be rested.

Having learned how to knead, the Bosch has given me the ability to vastly increase the amount of dough I can make at one time.  A recipe that makes 2-3 loaves of bread can easily be doubled.  The machine takes care of the arduous task of kneading.  I simply look on.  I do clean up, but am always drawn back to the Bosch.  I stare at the mixing dough, seeing it pull away from the sides of the bowl, being kneaded by the dough hook.  I occasionally stop the machine and touch the dough.  Too sticky?  I gently add a bit more flour and let the kneading continue.  After 10 or so minutes I stop my Bosch and do a final touch of the dough.  Soft, pliable, but not sticky?  Perfect.  I pull it out, giving it just a bit more kneading by hand.  Then into an oiled bowl, turning the dough over to make sure it's coated.  Covered with a tea towel, I place it in the oven for 40-70 minutes of proofing.

The proofing is when the dough rests and grows.  it should double.  There is nothing more magical then seeing your dough doubled.  Success.  You kneaded the dough perfectly.  Once doubled, you take it out ... and pound the dough, shrinking it back to somewhere halfway between it's doubled size and it's original size.  At this point there are so many things you can do with it.  Pizza shells, buns, breads, cinnamon rolls, twists.

With a doubled recipe I usually do three loaves of bread and use the remaining dough for treats.  I've made cinnamon rolls, hot dog buns, rolls, and pizza.  Bread sticks are always fun for a change.

I want to share with you one of the recipes I have been using recently.  It's the culmination of 3-4 recipes from various sources, tweaked until the resulting dough works for me.  You might want to tweak it a bit yourself, so that it becomes yours.

One special note - please use yeast from a jar.  Those individual packages?  I've NEVER made great bread with those.

Ingredients

Water, warm - 1 cup
Active Dry Yeast - 4 1/2 teaspoons
Sugar - 2 teaspoons

Water, warm - 4 cups
Salt - 3 to 4 teaspoons
Sugar - 1/2 to 2/3 cup
Oil - 1/4 cup
Flour, whole wheat or rye - 2 cups
Vital Wheat Gluten - 1 tablespoon
Flour, unbleached all-purpose - 12 cups

This recipe is for a double batch.  If you and your mixer can't handle this amount feel free to cut everything in half.  No worries.  Note also, my instructions will be for the Bosch.

First, place the first 1 cup of warm water and 2 teaspoons of sugar into the mixer bowl.  Swirl with your fingers to blend together.  Add the yeast and swirl again, so that the yeast is wet.  Cover and let rest for approximately five minutes.  While this is happening, measure out the remainder of your ingredients.

Once the yeast mixture has become frothy, you can continue.  In a separate bowl mix the remaining 4 cups of warm water, salt, sugar, and oil.  Mix and add to the mixer bowl.  Pulse to combine.  Next add the whole wheat or rye flour and the vital wheat gluten.  If you are using only white flour you probably won't need the vital wheat gluten.  It's useful when using flours that need more protein, providing an improvement in the texture and elasticity of the dough. Pulse to combine.  Add approximately 4 cups of the regular flour and start the mixer on 1.  Watch as the dough hook stirs the ingredients.  Slowly add more flour.  The mixture will start to thicken and the kneading begins.  Continue adding flour, slowly, until the dough leaves the sides of the mixer bowl clean.  Now let the mixer knead for another 5-10 minutes.  Check the dough occasionally to see if it's too sticky.  If it is, add just a little more flour (perhaps 1/4 cup at a time).  You don't want to add too much flour - then you'll have a dry, unmanageable lump of dough.  A little sticky is better than too dry.


Determining when enough kneading has occurred takes some practice.  The dough shouldn't be sticky.  It should feel as soft as a babies bum.  Take the bowl off the machine.  Pull out the shaft from underneath and remove the dough hook.  Pull the dough out of the bowl and place on a lightly floured surface. 


Knead just a few times to make sure the dough is at the right consistency.  If it isn't, you'll have to do a bit more kneading by hand.  Place the dough into an oiled bowl that will provide enough room for doubling of the dough.  Make sure the dough is rolled around in the oil so that all the surfaces are oiled.  An un-oiled dough will dry and crack and this cracked surface is impossible to remove or re-incorporate into the dough. 


Cover the bowl with a tea towel and place in a draft-free place.  (Dough doesn't like to get cold ... cold slows the doubling time.)  I like to place my dough in my oven.  This keeps it warm, and safe.  Set the timer for 40 minutes.  At the 40 minute mark check the dough.  If it's doubled, great.  If not estimate how much longer.  Sometimes it can take a total of 60-70 minutes.  For dough with more whole wheat/rye it can take longer. In the winter dough takes longer to rise then during the summer months.  Wet weather, dry weather ... all types of weather will effect your dough.


Once the dough has doubled take it out of the bowl.  Place it on your counter and pound it down.  you aren't beating the life out of the dough, more like pressing the excess air out of it.  It shouldn't shrink down to it's original size, but somewhere between.  Now, you can cut it into pieces for various baking items.  This amount of dough will make 4-6 loaves of bread.  I only have two loaf pans so I always make two loafs of bread, I use a square cake pan for a square loaf, and perhaps the rest of the dough becomes rolls or breadsticks placed on a cookie sheet ... or I might roll it out for a couple of large-sized pizzas.  For the bread pans and cookie sheets a light oil will prevent the bread from sticking.  I place these filled pans on top of my stove and cover everything with tea towels.  While the dough rests and rises again I heat the oven to 350F.  Usually 25-30 of rising is all that is necessary.  For the pizza dough, no rising is necessary - once you've rolled it out you can put your sauce, toppings, and cheese and bake at 425F for approximately 20 minutes.  For the rest of the breads, 25-40 minutes of baking at the aforementioned 350F will do.


I hope you try your hand at bread making.  Once learned, a whole new world of baking is possible.  You'll be released from ever needing to buy store-bought, plastic-wrapped bread from the grocery store.  You'll know what your bread contains.  You'll actually be able to pronounce every ingredient.  You'll be able to create something wonderful that you can share with friends and family.

Friday, November 15, 2013

Selling on Craigslist

On my last post I ended with a few things that still needed selling.  These included:
  • a bike trailer
  • a bedrail guard
  • a foldable stroller
  • a digital baby scale
  • a folding dolly
Now, I've had some experience buying and selling on Craigslist and I peruse it quite a bit (I keep a running list of items that I'm interested in ... if the price, quality, and location are good).  I see a lot of good and bad ads.  All this to say I've developed some steps that I take when creating my own Craigslist posts.
  1. Put together as many facts about the items as is reasonable.  Who makes it, model #, year made/bought/age, original price, dimensions (not everything needs this, but if you'd want to know others will too - especially true with furniture that people will need to place in their homes), weight (if important), materials it is made from.  You might not need all these details, but it's good to have them on hand.
  2. Do some searching on-line to see if it is still sold new - if so, what's the price like now?  Does it seem popular?  Amazon reviews will give you a good idea what people think about your product.  Key phrases might pop up that you can use when writing your ad.
  3. Next, e-Bay.  If you don't have an account with them consider getting one because this gives you access to some information that the average person doesn't get to see - what things sold for (and what didn't sell).  This is known as Completed Listings.  These completed listings often give you a good idea for a price range.  It will also give you an idea of which ads work better - style, layout, descriptions used.
  4. Now, Craigslist.  See if your product is being posted by others.  What are they asking?  Is it similar to e-Bay prices?  (Note:  You could also look at Kijiji - I use Craigslist so I'm more comfortable remarking on it.)
  5. Take a few photos.  Yes, you need them.  Would you buy something without seeing it?  If there are multiple ads (and there usually are), do you go for the ones with photos first?  Me too.  So, take a few minutes to take some shots of what you want to sell - a few overview shots, some close-ups.  Try different angles.  The most important point I can make here is to get rid of as much personal background/detail as possible.  You don't want people thinking "Gross, that stuffed toy looks like it's been kept in the filthiest garage I've ever seen!" ... you want them to focus their attention on the item you are selling.  I've even used bed sheets to create a plain backdrop.  If all else fails try to find an image from the store you bought it from and copy that into your ad.
Once I have done all these steps I'm ready to create my ad. 

Let's try these steps out with the first item on my list - the bike trailer.

Bike Trailer Ad

I bought this trailer a few years ago thinking I would bike around with Walter in tow like all the other parents seemed to be doing in town.  Except ... it didn't really happen all that much.  Maybe three times?  I just felt really nervous with my precious little guy behind me and all these vehicles rushing past me.  At the time we lived in an area nearer to secondary businesses which meant lots of truck traffic - these made me even more nervous.  Suffice it to say the idea was a bust (although Walter loved it - he asked to go out every day!).  I kept the trailer thinking that when we moved I would use it.  Our new neighbourhood is very hilly, and there are no nearby bike paths.  I'd have to drive with the bike and trailer, park, hook up the trailer, get Walter and myself all geared up and then finally start biking.  Ah, nah.  Instead, I traded my bike - which I never really liked - for a DSi for Walter.

OK, so what did I pay for it new?  I bought it at Walmart for around $109 ... say with tax $120.  It now sells for $104 with a current pre-Christmas sell going on for $50.  Ouch!  Looking at e-Bay I see a price range of 54-200+ ... but the 200 plus ones are way swanker than mine.  The 54-74 range are closer to mine.  On Craigslist the swanky ones are going for 200+ also.  Not much under 100.  Despite the sale at Walmart I'm thinking $55.  This will give some wiggle room for potential buyers to negotiate (everyone likes to shave off a few dollars).  I did do a couple of photographs of the box.  I confess to not taking it out and setting it up.  So, I copied the photo from the Walmart website (something many people do).  If I have time on the weekend I'll set it up and take some more photos to make it more authentic.

So here would be my ad:

TITLE:  Triumph Bike Trailer Holds 2 Children - $55

PICTURE:  I usually take a few photos, including the box, manual, and an overall photo

DESCRIPTION:

When our son was younger he wanted to ride in this bike trailer every day!  Although it can hold two children, our son always had his stuffed toys, snacks, and water bottle taking up some of the space.  Still, we could likely have put a few bags of groceries in there too!

Now that our son is older we've outgrown the bike trailer ... time for our son to have his own bike.

Our loss is your gain.

Bike trailer has been kept in pristine condition, in a no-smoking, no-pet household.  We have the original box and owner's manual.

If you are interested call, text, or email Louise (cell ###.###.####)
 ... cash only

That's it.  I made the ad personal - which tends to draw people in.  I'm a person, not a crook.  The item being sold is mine, it wasn't stolen.  I included details that made it seem spacious (it is), and that my child liked it (which was true).  Having the original box and manual makes it sound like I looked after it (which I did).

I'm going to put it up now.  I'll let you know if my strategy works!

Wednesday, October 23, 2013

Dining Room Chairs - ReUpholstery Update

Just so you don't think I've forgotten.


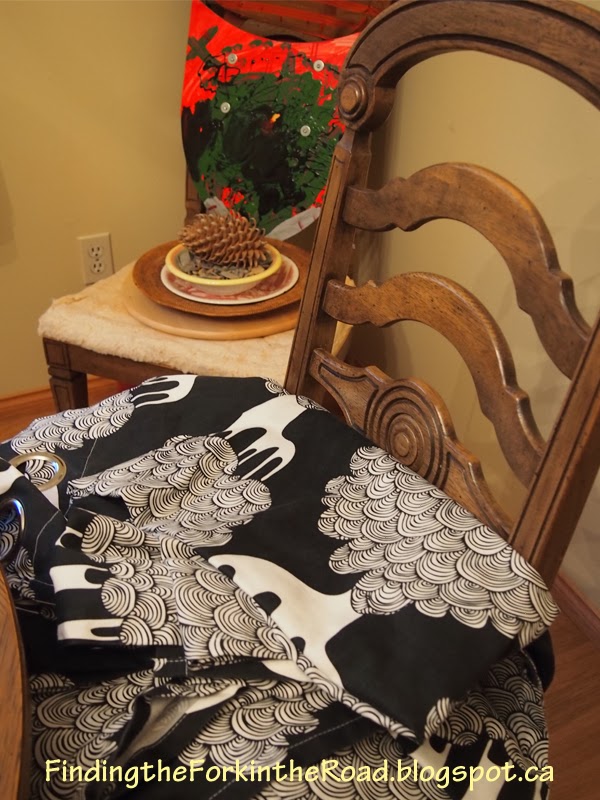
See?  I actually pulled out the package of Ikea curtain fabric two weekends ago and washed it.  Then?  It sat on my chair by my bed for another week.  Last weekend I finally found the tools I'd been using to pull off the old seat covers (we had guests, things got moved, I couldn't find things for quite a while).  I brought them up from the basement and they sat on the dining room table for the week.  Yesterday, I moved the washed curtain fabric to the dining room.  This is progress, right?!

You can see the chair in the background, naked, without any fabric.  It's been waiting all this time to be re-covered.


I'm hoping my inertia on this project will slowly give way ... and that finally that first chair will no longer be naked.  At this rate, the seven chairs will all be re-covered by ... ah, I can't even think how long that will be.  I've got to get this thing done!

Monday, June 03, 2013

Sewing Drapes for Big Openings

I thought I would give a slightly more in-depth explanation of how I sewed the drapes (curtains?) for the living room sliders.

The sliders in the living room are quite large, measuring 95" from the inside frame (96" would be eight feet).  When we moved in the sliders were covered with shears.  Not being a shears kind of person, I wanted to replace them (plus the mechanism to close and open the shears wasn't working properly).  We got a curtain rod and new brackets from Ikea, and I purchased a single set of Ikea Merete drapes.  Each panel measured 57" wide, so I assumed that 114" (two panels) would easily cover the slider.  It didn't.  I started doing some research on-line to see what I was doing wrong.  Turns out that even simple, non-full drapes require at least twice the width to really cover adequately.  For a really full look, especially if you like the pleated look, you should really look for three times the width.  That meant I needed at least 190" or 95" per panel.  The widest panels I could find were 59" ... nowhere near enough.  After thinking it through for a couple of weeks, and considering other options, I decided to take two sets of Merete drapes and sew them together.  I really came to this conclusion while considering sewing my own drapes.  I was chatting with a salesperson in a fabric store.  I asked how they dealt with their custom drapes that they sewed for clients since I didn't see any fabric bolts that were wider than 59" ... turns out they sewed panels together to get the full look.  Dah!

So, back I went to Ikea for a second set of Merete drapes.  When I got home I took two of the panels and put them facing each other, with the side that would face towards the slider (the backside, so to speak) on the outside.  Since the Merete drapes have large, over-sized grommets that are used to hang the drapes, I knew I would start sewing at the top end to ensure that they lined up properly. 


Holding them together with the tops lining up I used my sewing machine to attach the two panels on one side.  It wasn't difficult to do; however, two panels of Merete drapes are quite heavy, so I did have some wrangling of fabric to do while sewing.


When I came to the bottom I realized that the panels weren't perfect.  One panel was definitely a different length then the other.


Since this was the bottom of the curtain it didn't matter too much.  I would be folding and re-hemming.  I simply needed to consider this when doing my folds.  Next, I ironed the seam flat.


I then took the sewn panels and laid them flat on the living room floor.  I measured from the curtain rod to the floor - 89" ... almost 90.  All the instructions I found for sewing curtains said to check what the shrinkage of your fabric is and consider this when making a decision on length.  The Merete package said the fabric had a 4% shrinkage rate.  90 * 1.04 = 93.6" - I decided to go for 94" since I was still considering moving the curtain rod closer to the ceiling.  I used my measuring tape, and with the help of Walter I marked the fabric with pencil at several intervals along the length.  I then used a ruler to connect these markings in a complete line drawn across the fabric. 


I returned to the ironing board with pins and began a first fold iron of approximately 1/2 - 1".  This step was to protect the possibly exposed cut portion of the fabric (and in my case, take care of that uneven meeting of two panels).  I then took a second pass with the iron, this time folding to the pencil line.  As I ironed I paused to put pins in - these would hold the fold until I could sew the hem. 


Once I completed this step I went back to the sewing machine and sewed my hem, keeping the stitch close to the fold (about 1/2" in from the fold). 

Then I simply repeated all the steps for the second two panels.

We've gone from this:


 To this:


It's definitely more our style.  I like the feel of the cotton window coverings over the scratchy, synthetic feel of the shears.  The new drapes still let some light in, but it's definitely harder to see in at night.